Prius Seat Heaters and Lumbar Support
Never attempt this activity. You will destroy your car and surely bring death or dismemberment upon yourself, your loved ones and your pets. I offer this information only for academic purposes, and am compelled to warn you that even viewing it could put you in mortal danger. You assume all risk after reading beyond this line.
Many people (me included) find that the Prius seats lack lower back support. Inflatable bladders was the answer! I figured if I'm going to tear the seats apart and run power anyway, I might as well heat the seats at the same time I'm adding lumbar support. At one point I was going to swap the seats out with some Recaros but the extra money, and the loss of the side air bags, etc was more than I was prepared to sacrifice. Plus they still wouldn't be heated! This seemed like a good compromise, and involves more effort. :)
I won't kid you, there are parts of this that can be pretty tough. I have new respect for the upholstery guys now! My finger tips are raw, but I'm getting it done! This isn't so much a "how to" as just providing some reference and ideas for the project. I removed all hog rings that I encountered, and replaced them with zip-ties. I kept forgetting one thing or another, and had to cut out my zip-ties and start over. I think I STILL forgot the upper clips in the seat back!
Lumbar bladders are made by Rostra. Heaters purchased at Cartek. Great folks to deal with. They helped me out when I had an issue years after installation.
Tools/supplies:Some measured specs:
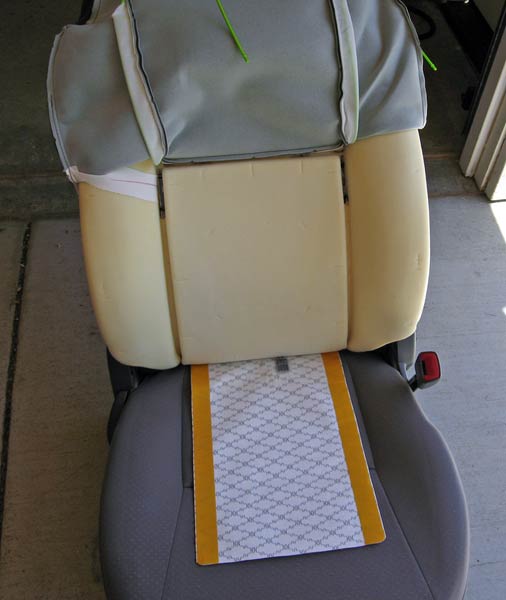
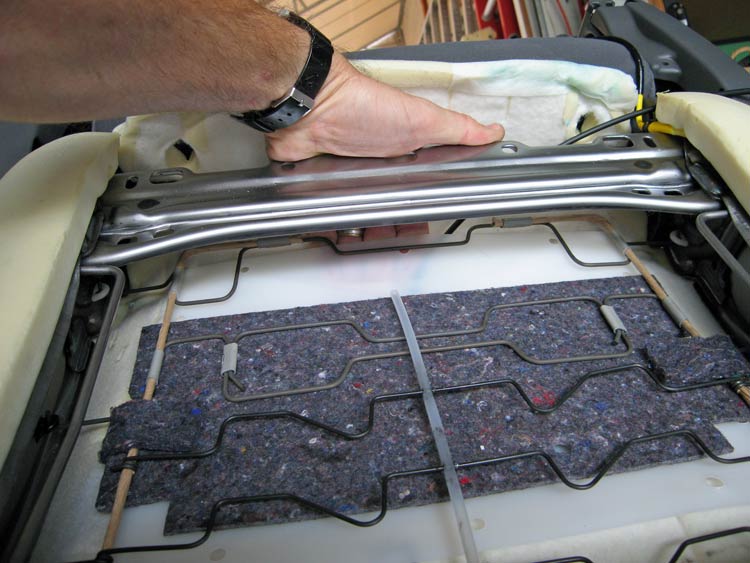
Pulled the back cover up and prepared the heater
pad for installation on the back. I sprayed the entire surface (only the pad
surface, not the foam) *lightly* with 3M-77 Adhesive spray so it would be
tacky all over, instead of just on the side strips.
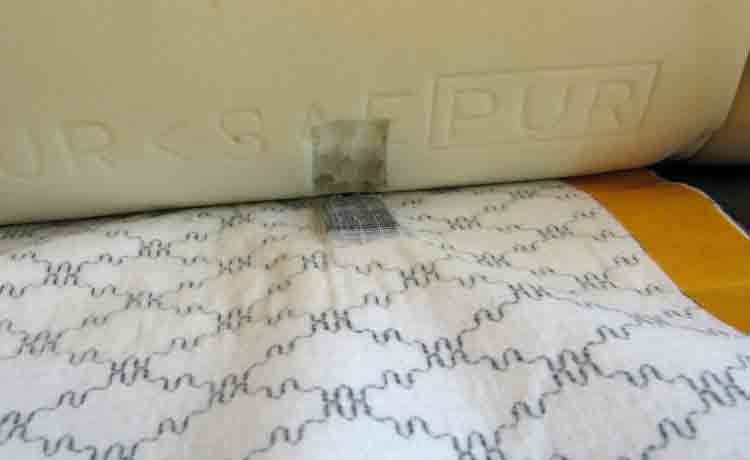
Before gluing it down, I cut a small pocket in
the seat foam for the little black box to press into. Here it almost looks
like a reflection. I used an X-acto knife and just plucked the middle out.
Is it needed? I don't know. Probably not.
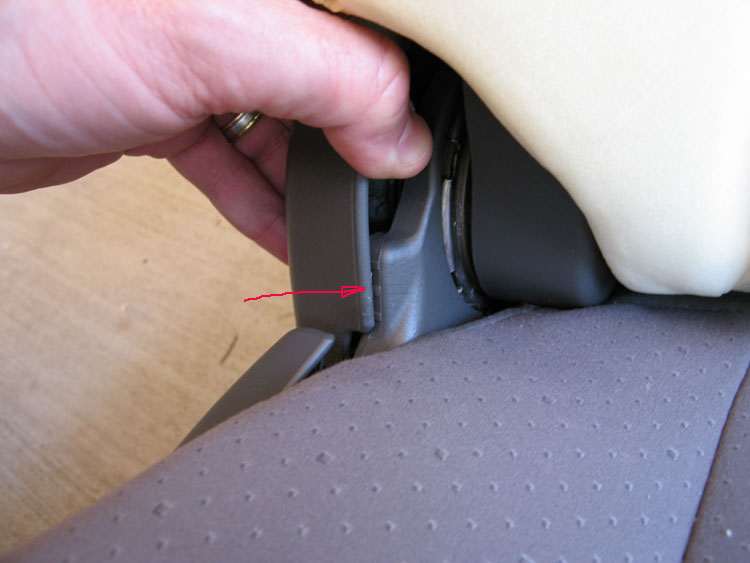
Trying to remove the plastic seat side-panel.
There is one connection right behind where the arrow points, that is seemingly
impossible to remove. In the end, I broke the clip, and recommend others do
the same. That thing is not needed since there is a screw right behind it
that holds everything in place just fine. If you can figure out how to undo
this clip, all the power to you!
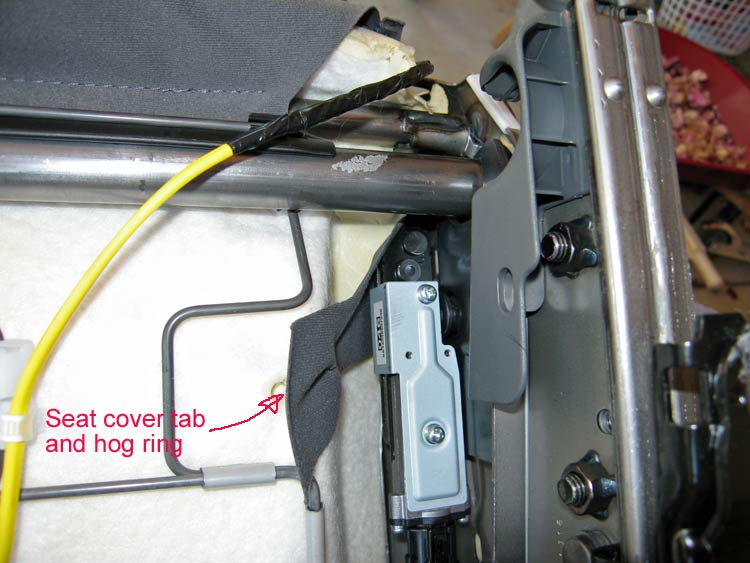
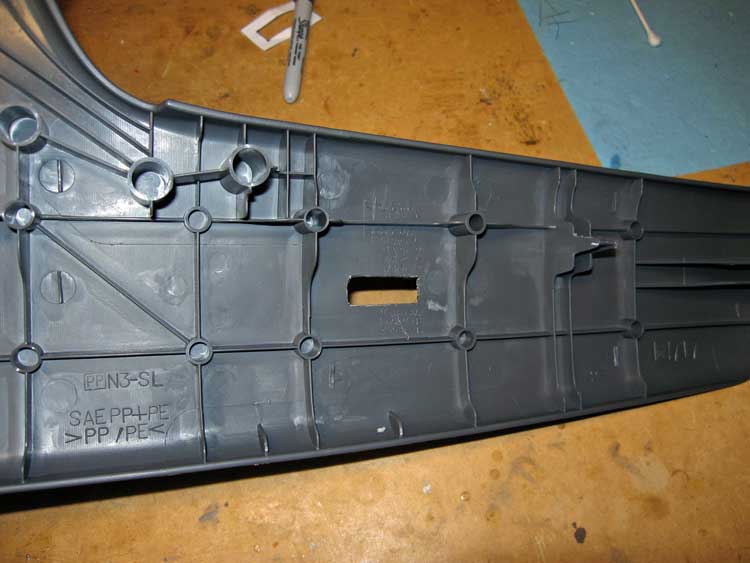
Here is that same area of the impossible clip,
but with the seat upside-down and the cover off. Arrow points to the broken-off
clip, which is STILL in the hole! Even after breaking it and removing the
side cover, I still could not extract it with a screwdriver and pliers pulling
directly on it! It'll stay there for the duration as a warning to other clips
that may try to mess with me in the future. Also shown here is a tab from
the seat bottom that pulls around and clips to the metal frame. There are
several of these little buggers that you have to remember to *undo* and then
again to *redo* when you are done.

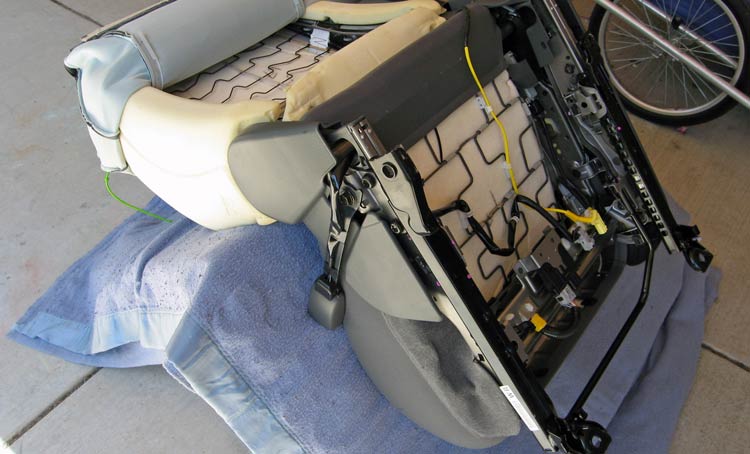
Here is another one of those tabs that comes from
the seat bottom. This one is held in with a hog ring through the bottom of
the seat foam. I replaced all of these with zip ties during reassembly.
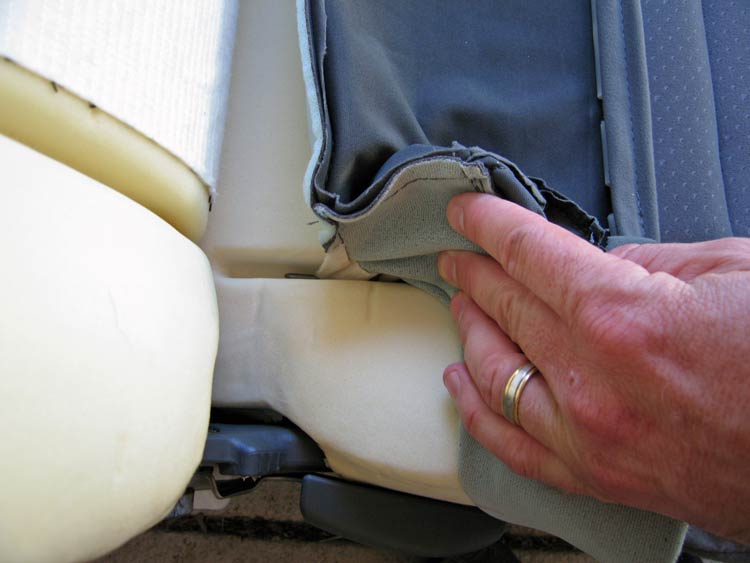
As the seat bottom comes off, there are plenty
of hog rings to keep you busy. I just clipped them with wire cutters, and
removed the pieces with needle-nosed pliers. I used zip-ties to put everything
back together. Shown here is the first one you come to.
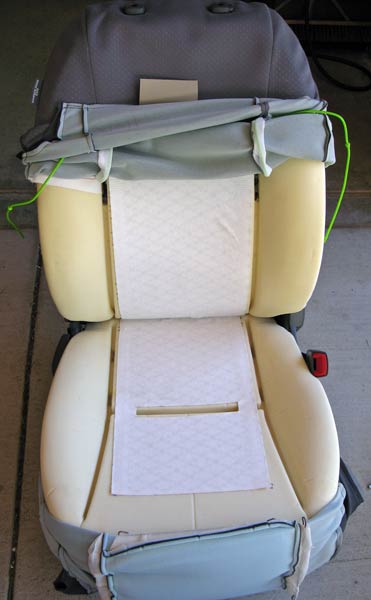
Here I have both heater pads glued in place (hey.
only one wrinkle!) with a notch cut in the bottom one for the securing wire
that is hog ringed down into the seat cushion.
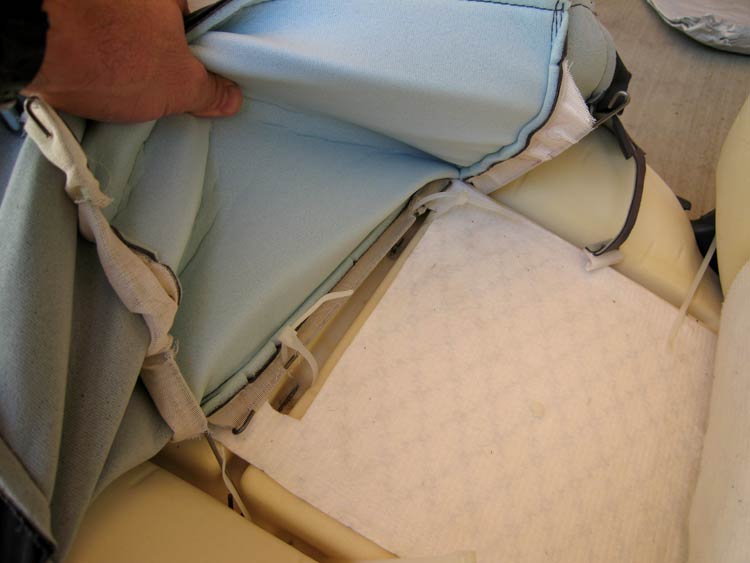
Putting the seat bottom back together with zip-ties
in place of the hog-rings. Shown here is the notch in the heating pad to allow
for these connections.
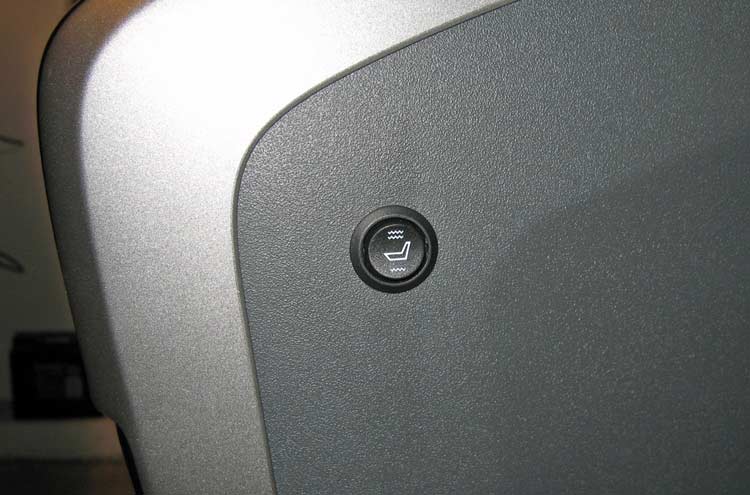
And the end result is that this is all you have
to show for the trouble. While I'm thinking of the console, here are the tips
for getting in there: Pull up on the shiny front edge (shown here) with your
hands. The two cup holders will come off, and expose the two screws at the
bottom. Remove the screws, then from inside the console, pull up the rug (just
sitting there) and expose the two 10mm bolts at the rear. With those removed,
the entire console comes off. Tilt it BACK, and struggle with getting the
two harnesses unclipped. Then the whole thing will be free. Put it somewhere
where it won't get scratched.
And onto the lumbar part of the project...
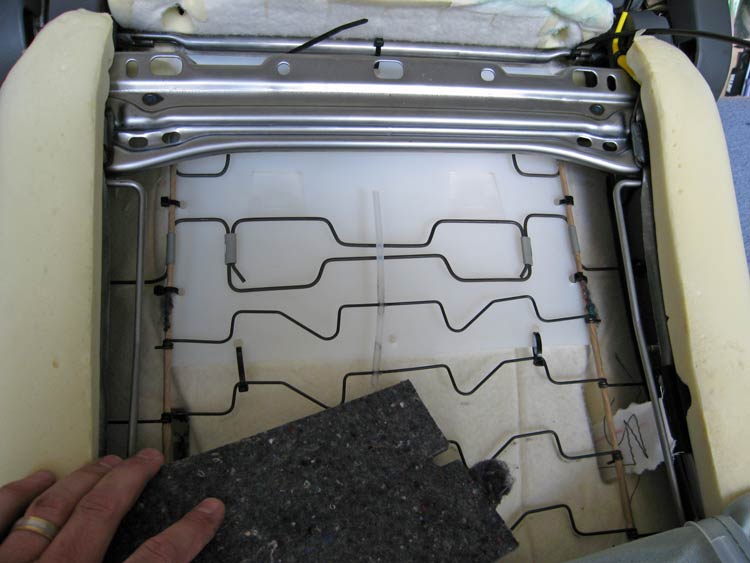
First I tucked the bladder into position (tested
the height with the seat out and the pump hooked up to a 12V power supply).
I found it was easiest to tuck the bag in from the direction my hand is shown.
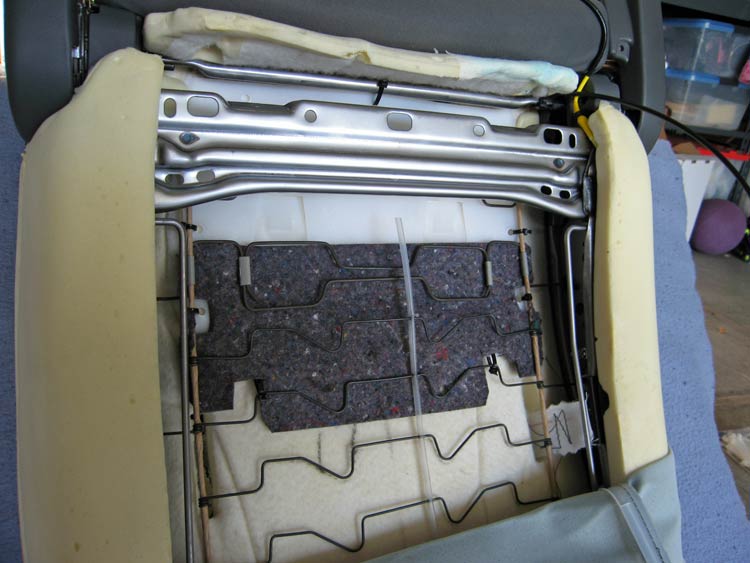
The bag is fully in place here, behind the felt pad and springs.
I removed the felt pad to have better access to
the zip-ties. I used black ties to the seat springs. Good to have lots of
extra ties so you can cut them and reposition plenty of times... like I did!
Everything back in place, and some notches cut
in the felt because the zip-tie interference.
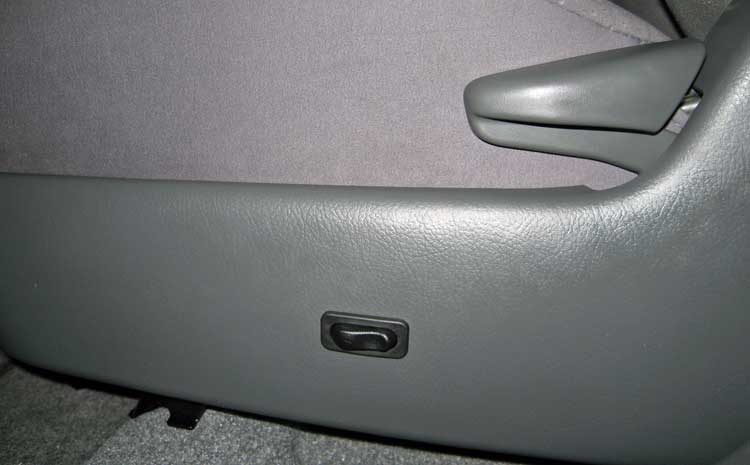
With the bladder in place, it is time for the
switch. With the side-panel still off from the heater project, I cut a hole
where I wanted the switch to be. I used a hot-knife, followed by a utility
knife to clean it up.
Switch in place.
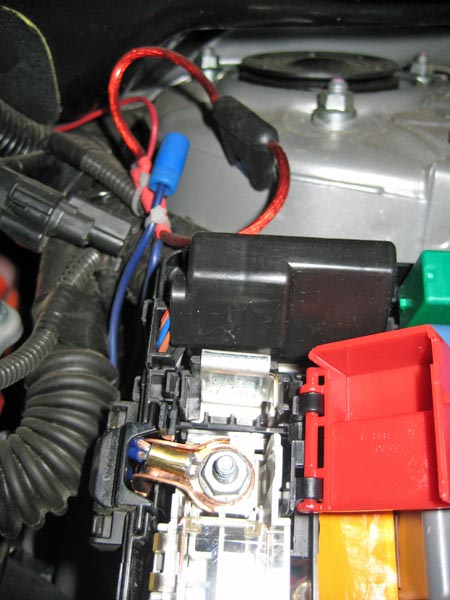
And now the wiring begins. First order of business
is to get +12V back to the seats. There is power in the console, but I thought
it would be better to take it straight off the battery, and not force it to
compete with any draw from the outlet. I soldered an eye on the end of a fat
wire and bolted it to the prescribed "jump start" stub in the fuse
box to the right of the engine. Wire exists out of the bottom of the box and
passes through one of the included inline fuse holders (normally tucked down,
but pulled up here to show). I also pulled a second wire (blue) and stubbed
it off for later use.
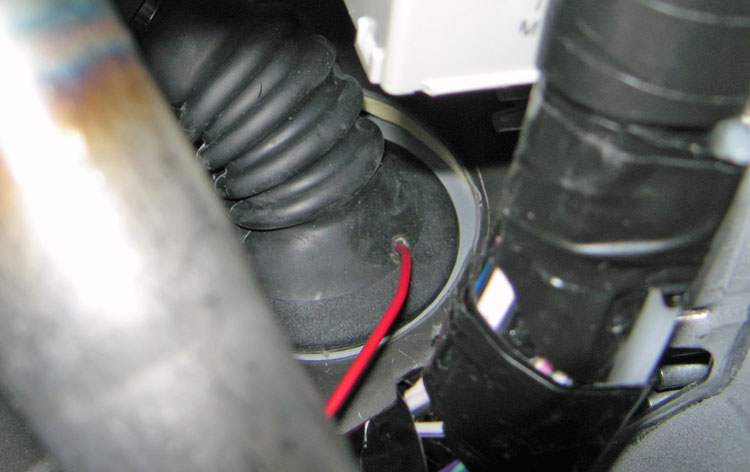
I then passed the wire through the huge wire grommet
in the firewall. Hard to see in there, but follow that red wire back to the
black grommet in the firewall. That's where I poked through.

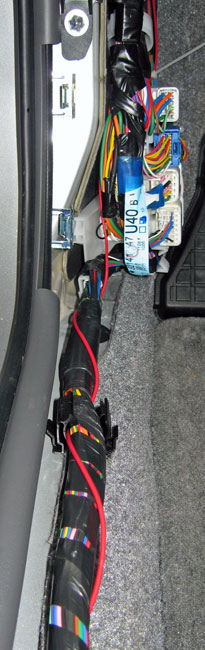
Here is my new bright red wire along the
door sill, and poking through the giant grommet above/between the throttle
and brake.
That red power wire is brought under the carpet to the center console where it is distributed as needed. All major connections are done under the center console. Shown here are the three relays screwed to the mysterious silver box that is found under the console. Maybe this is where they keep the "black box" flight recorder??? All power for the heaters and lumbar pump come through the middle relay. The side relays control the heaters in each seat. The trigger to allow everything to happen is the ig-switched power to the console 12V outlet.
To remove the console:
1. Open console lid and remove the rug on the
floor of the thing (just pulls out). Remove the two screws at the bottom that
you just exposed.
2. Remove cup holder trim from the front of the console by just pulling it
off the clips. Remove two screws from the FRONT lower sides of the console
that are now exposed - down near the floor at an angle. Don't remove the screws
on the side (in the middle of the console) that are difficult to get to because
the seats are in the way. Those only hold the shelf in the console.
3. Console is now free. Tilt whole console back. It will still be attached
by all the wires in the rear of the thing for power, audio, etc. 
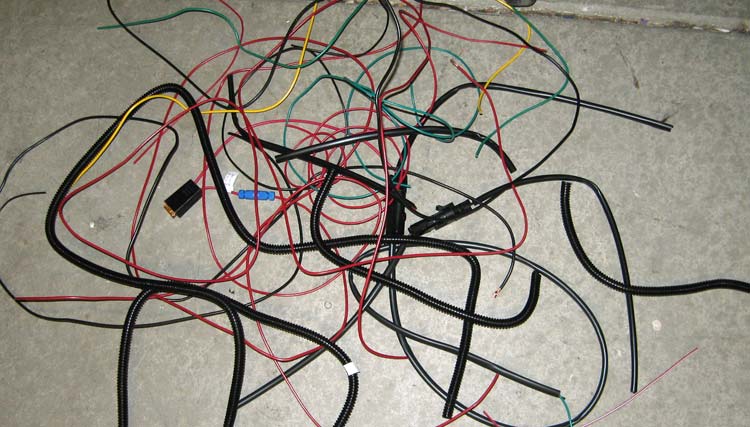
Just some of the "extra" wires and connectors
after the harness reconfiguration. This is probably half of what I didn't
use.
All the connectors for the driver seat. Two white
in the foreground are the lumbar power and switch connectors. The two green
ones are for the heaters.

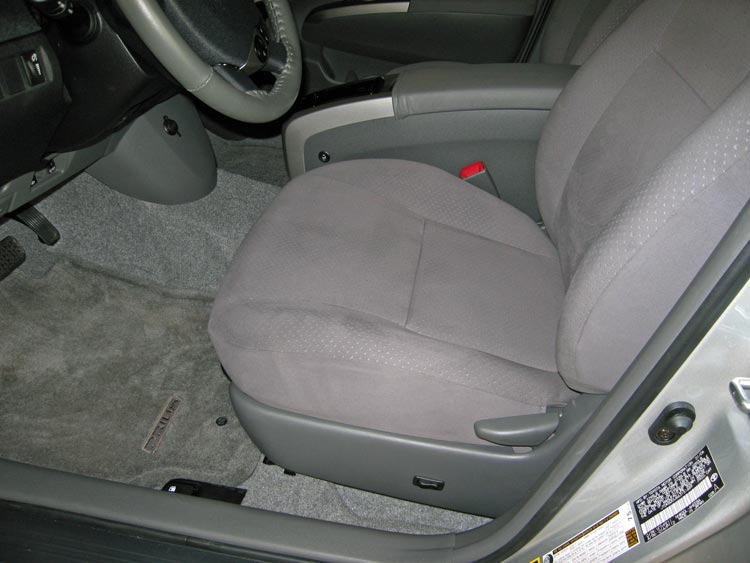
What it looks like when it is all done!
We finally took an extended trip (1500 miles) where I got to enjoy my labors. Driving four straight hours was actually *comfortable* with the adjustable support. I found that there is no one perfect setting. Being able to change it ever half hour or so made all the difference in my comfort. I'm VERY happy with these mods!
Click for |