Prius Trailer Wiring (Plug 'n' Play)
The Draw-Tite 18308 (which has now been replaced with PN118308 for reasons unknown to us mortals) is the trailer
wiring harness for a 2002 Camry fits the Prius2, and just needs to be "repinned"
to work perfectly. The following is my installation, following Nate's repinning
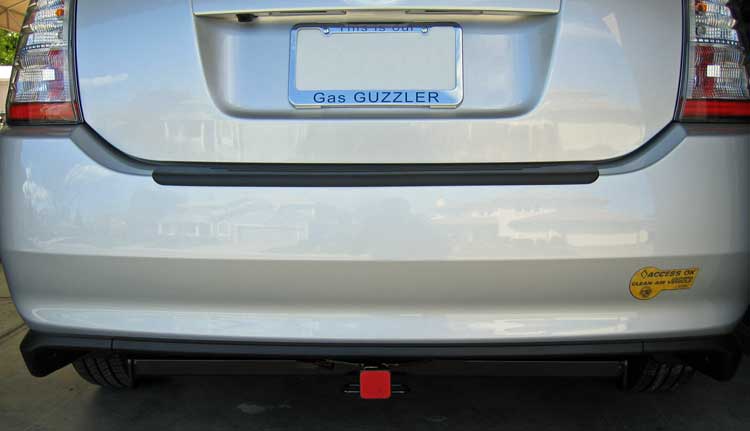
instructions. I already installed a Curt Hitch,
so I figured I might as well get the wiring done to complete the job. You
never know when you might want to tow.
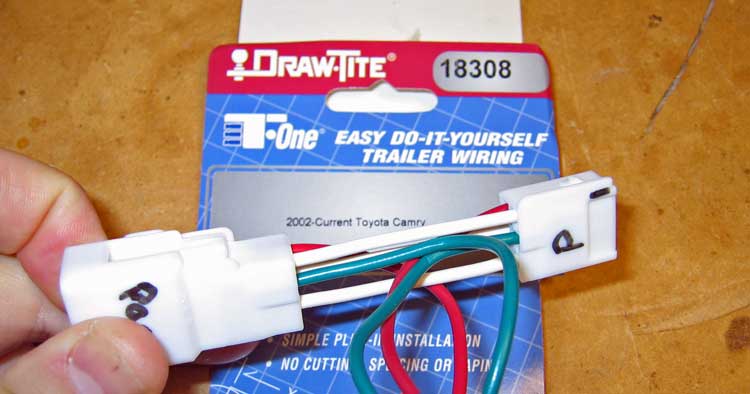
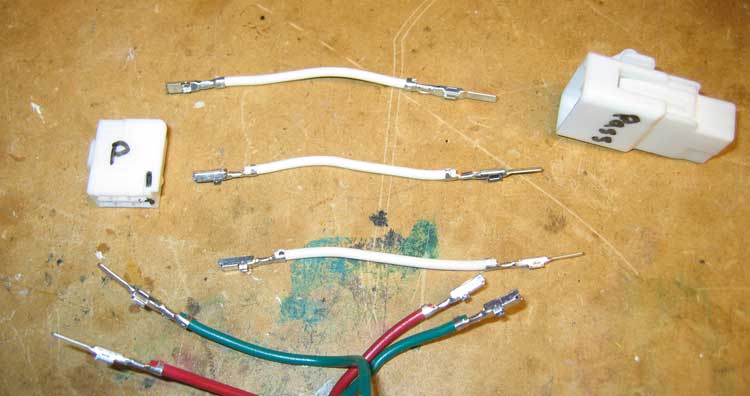
Here is the harness to purchase. I found that it is a common
part (I think we can all agree that the 2002 Camry is a relatively common car), so there should be no trouble finding them.
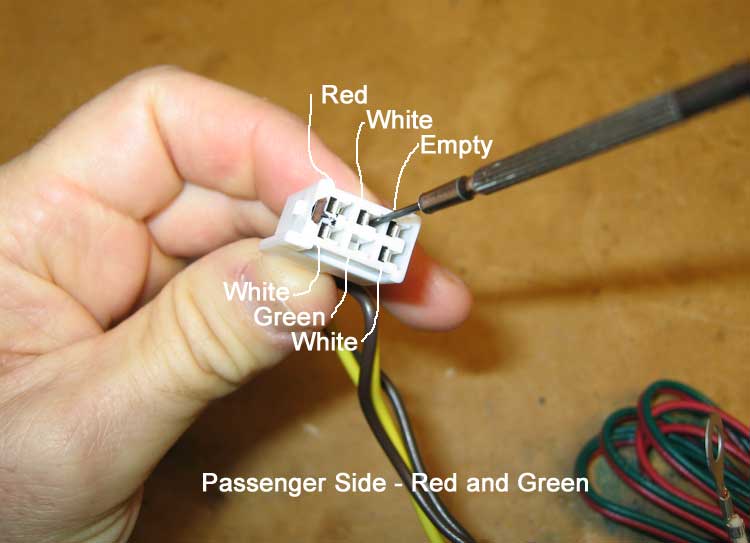
I marked this green and
red one "P" for Passenger side to avoid confusion. Shown here is
the original wiring for this side. Notice that ALL wires go directly across
from one connector to the other. Most signals pass directly through, but we
temporarily borrow the turn and brake signals... and put them right back where
we found them in the other connector. Each white wire must pass directly across,
and you "pretend" that the colored wires do the same thing after
they detour through the magic black box.
Before the "depinning" process can begin, pull this
lock block out of the connector (the thing into which the screwdriver
is shoved below). I found that I was constantly pushing it back in with my fingers
during the depinning process, so keep your eye on it. You aren't getting those
connectors out unless this is pulled out first! A trick to use is *gravity*. Orient the connector so that the lock block hangs down. Even better idea to hold the connector in a vice in this orientation, since it is REALLY handy to have two hands for the rest of this.
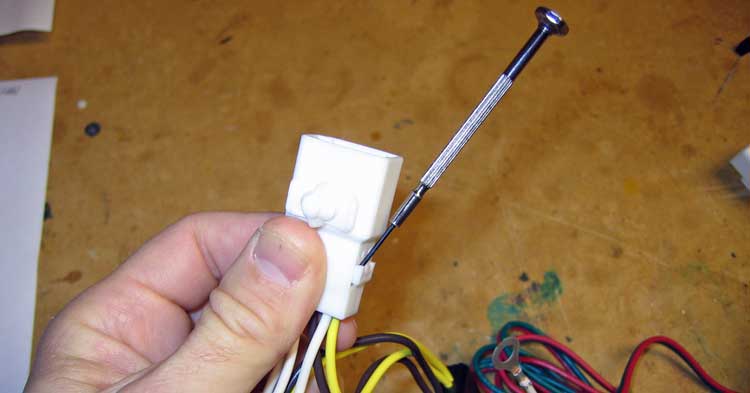
Start with the big connector because the process is easier to see. Choose a pin to remove and probe your tiny screwdriver at the location shown below. Place the tip of the screwdriver on the tip of the white plastic lock next to the metal pin, and pull the lock away from the pin. If your screwdriver is small enough you can see what you are doing - it is not a blind operation. (hint: look into one of the empty connector holes to see the little white lock just sitting there. That's what you need to pull back from each pin). When done correctly, the wire is quite easy to pull out - it basically falls out. If you have to pull at all hard, you haven't released one of the two locks. STOP PULLING and figure out what is still locked. Have you pushed the lock block (shown above) back in, perhaps? Or maybe you didn't get a good angle on the individual lock. The following two pictures (though of the
driver's side only) demonstrate what color of wire goes where in each plug.
The sockets here must match up with the plugs on the other side.
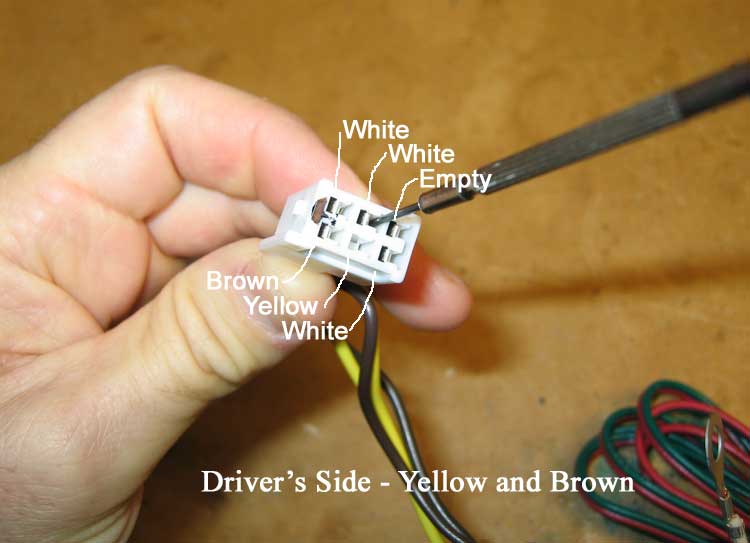
Though this is again the driver's side plug, I have called out
the colors for the PASSENGER side in this picture.
The first thing I did was remove all wires from both plugs.
Much easier this way. Don't worry, you won't get lost! Yank them all out,
then refer back to the pictures above for reinsertion.
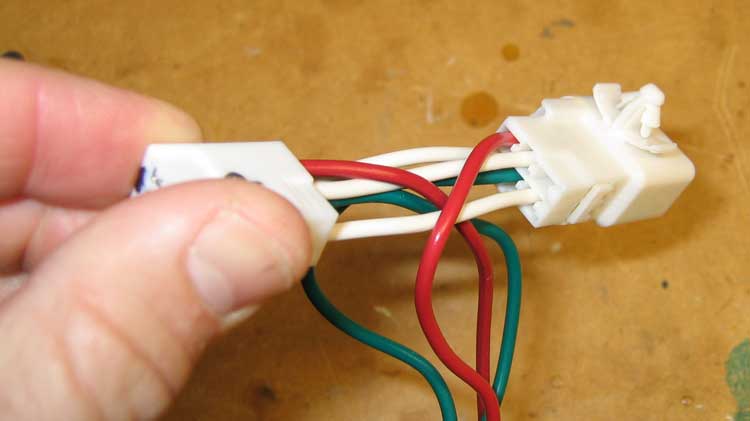
This passenger side is now done. Notice that the wires all go
straight across from one plug to the other.
Now that you have the pins done, it is time to plug it into
the car. This could not be easer. Remove the access panels for the rear lights,
and you'll see the white plug in the middle. Slide a small screw driver into
the far side of the receptacle to release the lock, and pull the plug out.
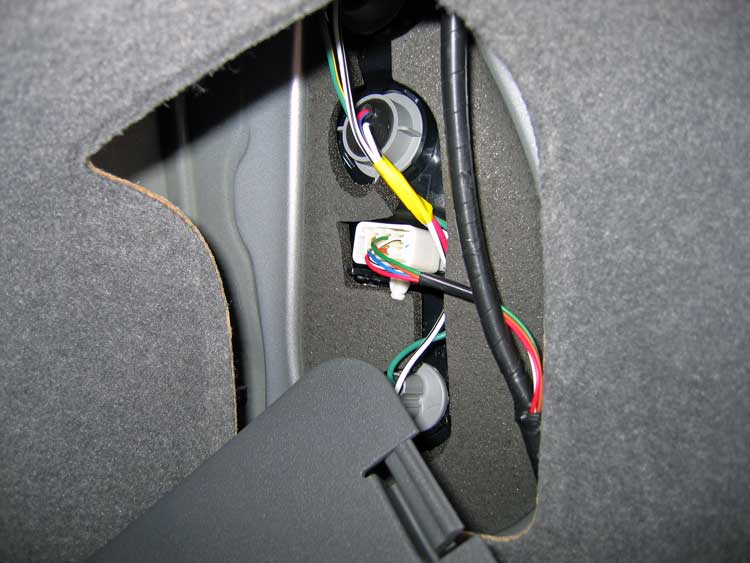
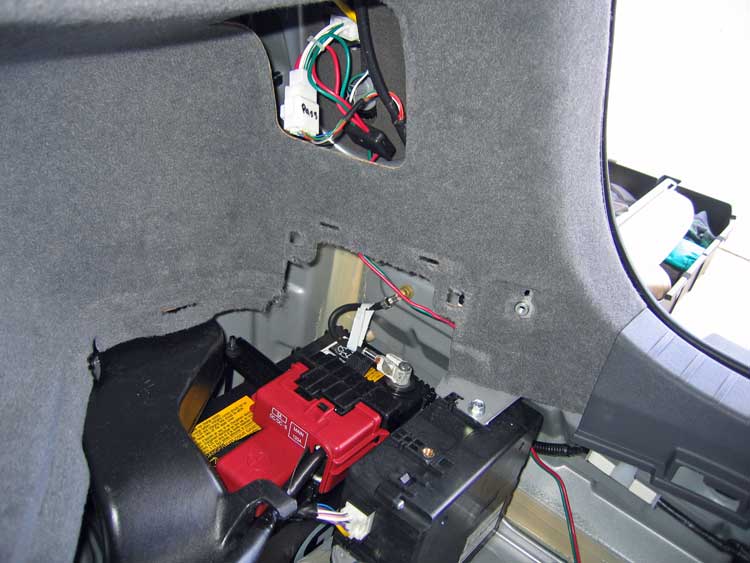
Then plug the new harness between the car's socket and plug
as shown here on the Passenger side. I also removed the tray over the battery
to route the wire. Remember to route the wire behind the gray fuzzy stuff
before plugging everything in... I didn't! No biggie if you forget - you'll
just be unplugging and replugging the connectors a lot. You get good at it
after the 5th time. :)
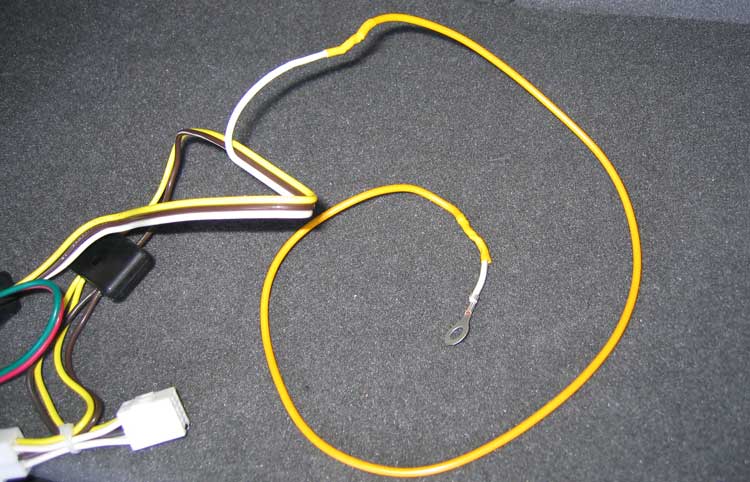
Taking advice from others, I just added a bit of yellow wire
to the white ground wire so it will reach the easy ground position shown later.
I kept the factory ring on the end which is the perfect size.
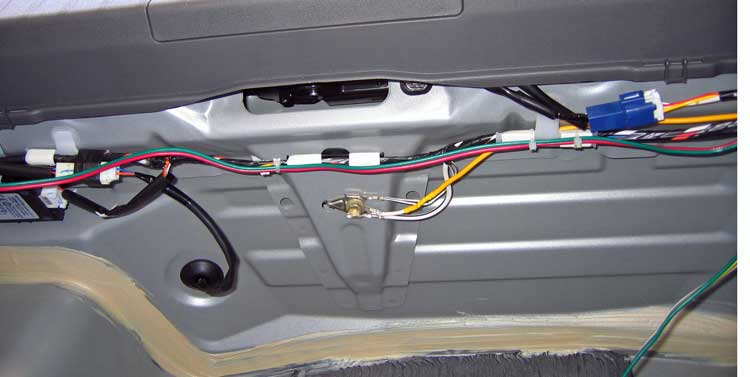
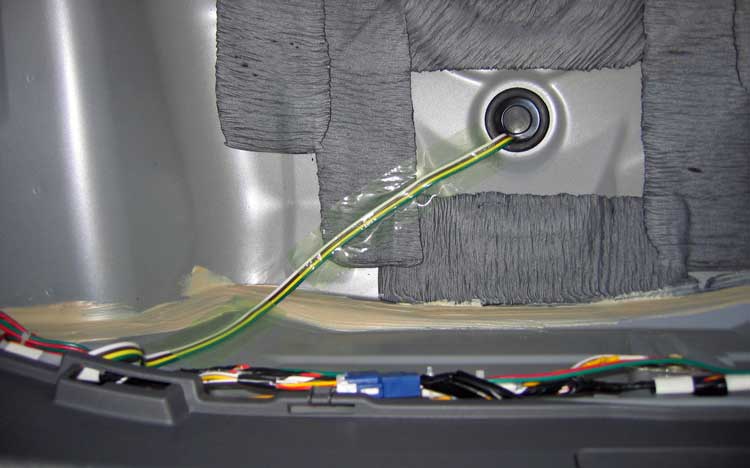
Right in the middle of the back of the trunk (remove the floor,
and even the tray and spare if you want to do what I did later...) you'll
see a ground screw. I used that for my new yellow ground. The green and red
wire going across is the wiring harness link from passenger side to driver's
side.
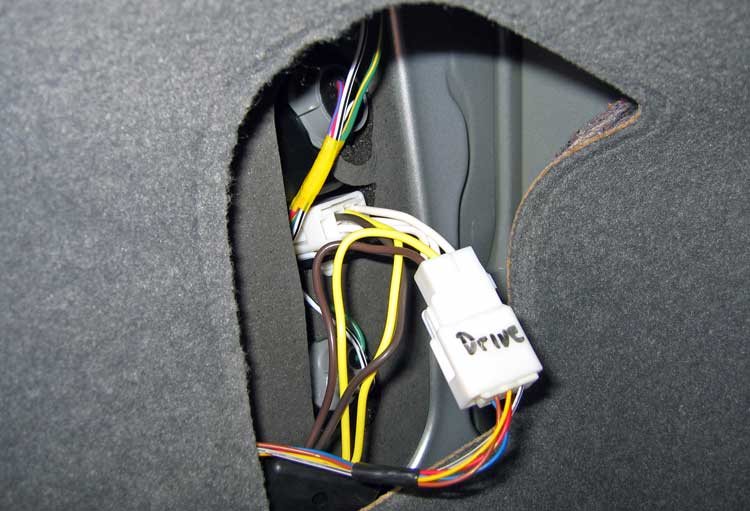
Then over to the Driver's side, and plug that harness in the
same way.
Then mount the black box (or just let it dangle). I used the
supplied sheet metal screw to just fasten it to a metal flange back here (try
not to drill through the exterior sheet metal skin, OK?). Zip tie the wires,
and the wiring is in.

Now we need the trailer connector outside the trunk! There's
a perfect rubber plug under the spare. Just cut a small notch and feed it
through. (Good time to check the pressure in the spare while you're here!
60psi).
And under the car... I just zip-tied it to a hole in the plastic
belly pan, and then zipped the connector to the hitch cross-bar.
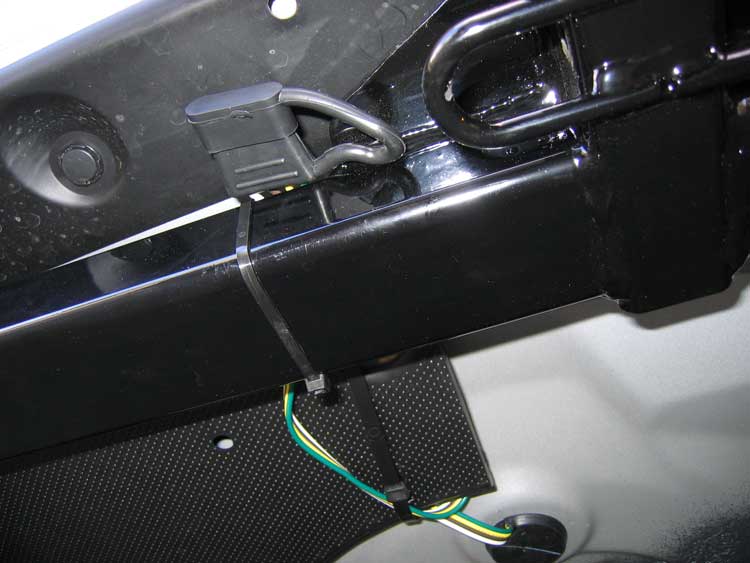
Here's what you'd see on your knees.

And all done you can't even tell there's a connector in place.