
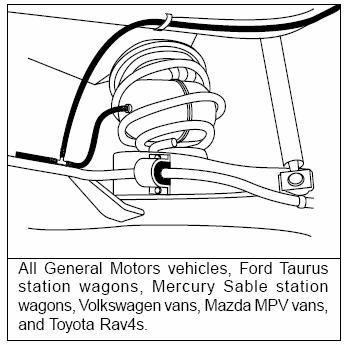
Rav Air Lift
December, 2007. The rear suspension on my Rav has always felt too soft. When I load the whole family, our cargo, and the portable charger... speed bumps and curb cuts serve up a rude reminder that the suspension bump stops in the back are just a couple of inches away...thud. Sometimes I even *gasp* tow a trailer! Before folks start to worry for me - I realize that adding air springs will not increase my load-carrying capacity, nor will they increase the GVW of the Rav. The big benefit of these bags is in allowing me to continue using the Rav in the ways that I always have - just making it safer and more comfortable to do so. The side benefit is that the ride and handling (even while empty) are improved. Warning! The preceeding was a 100% subjective observation. Your experience WILL vary.
I purchased Air Lift airsprings from AutoAnything by choosing Toyota-Rav4-1999, and "air suspension." The product you want is the Air Lift 1000. It is the most basic kit. Price is about $77 with free shipping. I've now proven that the kit for the gas car will fit the EV. Yay. The official installation instructions are here.
Here's what you get in the box. And the good news
is that the EV doesn't need all the silver bits in the front/left bag. More
on that in a bit.
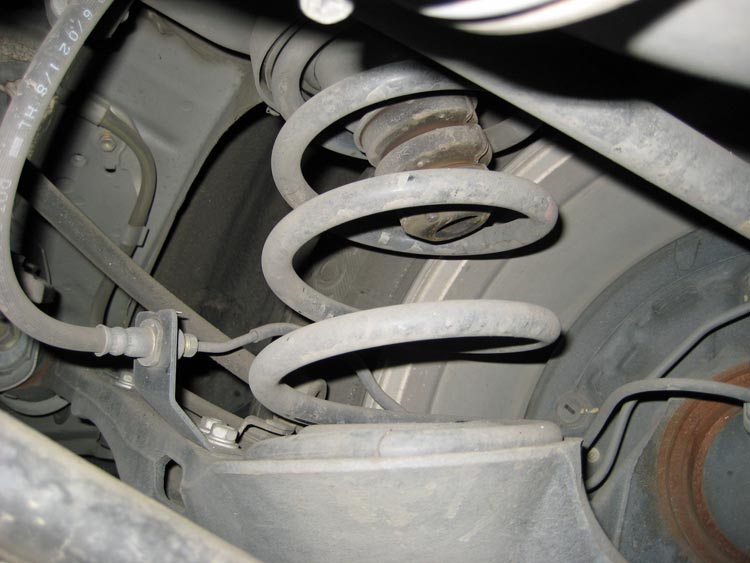
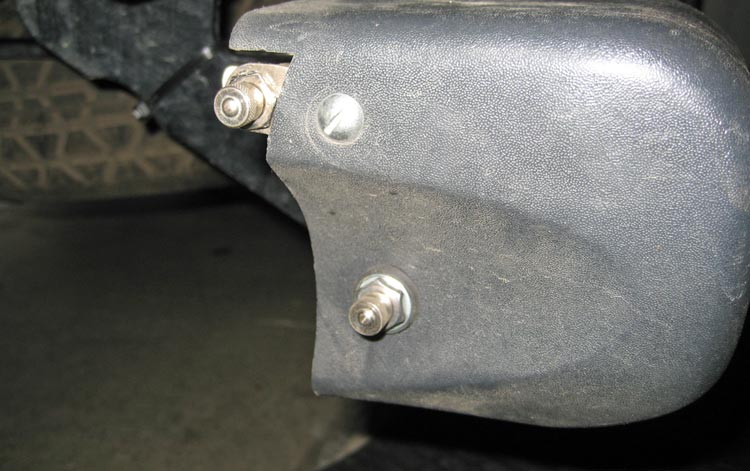
And this is what you're shooting for:
And here is where the bags will end up. In the
spring, and under the rubber bump stop. The spring shown here is stretched
to max. You don't have that much room normally. To achieve this, I jacked
up the bumper bracket until the wheel on that side started to lift off the
ground.
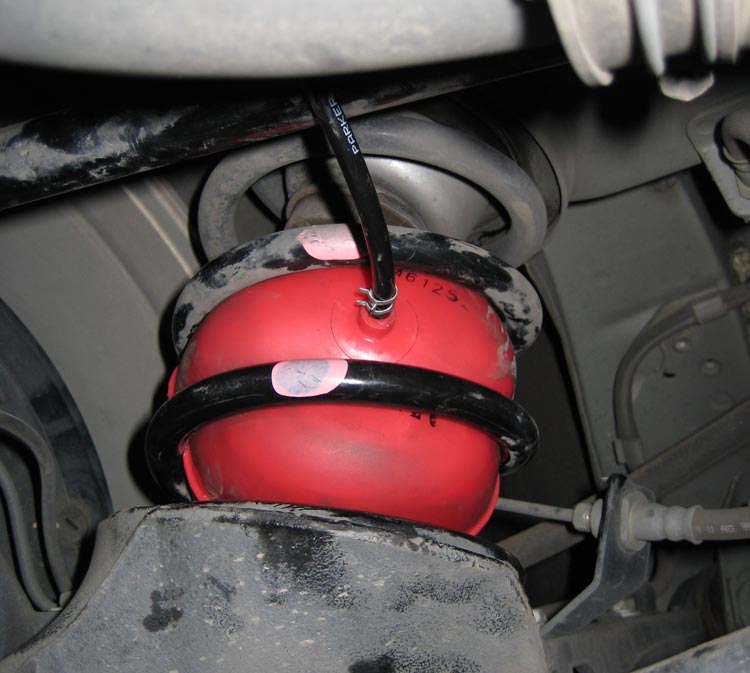
Following the instructions, you press all the
air out of the bags, and tuck them into the springs. This is somewhat of a
bugger, and can play hell with your manicure. And when done, I did not have
much hope that they would ever inflate to the right shape! (The attached air
hose only goes on after insertion. Shown here, I am about ready to try and
inflate it for the first time).

Worked! (Duh, or I would likely not be showing
pictures of my failure, now would I?)
I opted for a single air inlet, so I added the
included T fitting just before the air hose attaches to the schrader fitting.
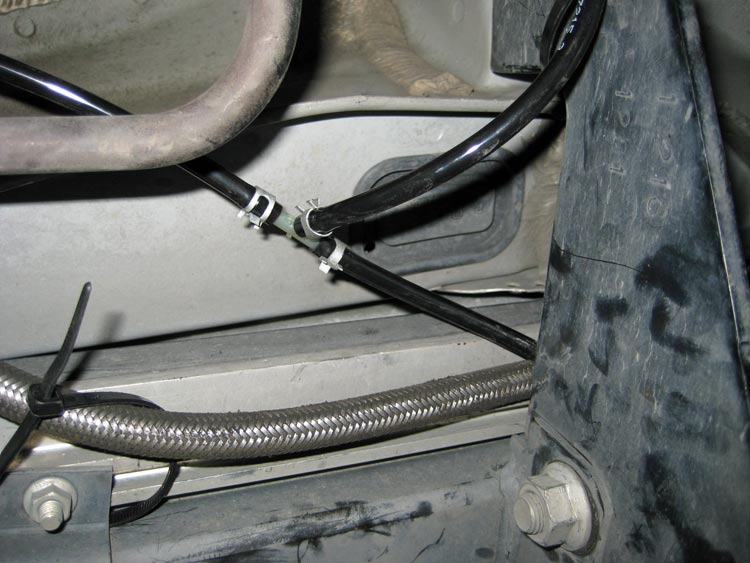
The black hose is the new air fitting that I passed
through one end of the bumper. The braided line above it is my spare tire
hose.
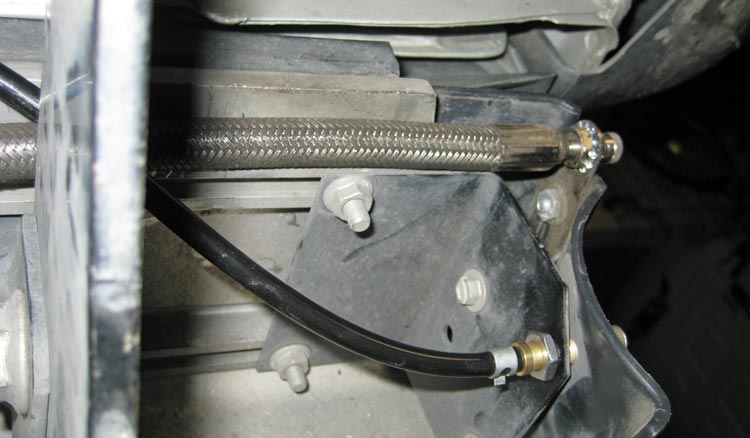
Sorry everything is so dirty. The spare tire valve
is the upper one. The new air spring valve is the lower one. This is the driver's
side of my bumper/hitch.
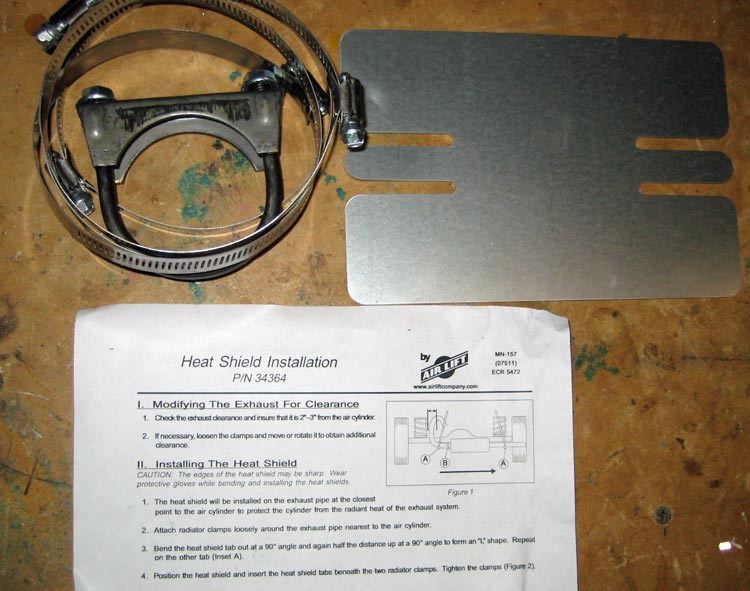
And finally... I think this is the best part.
See all this stuff? NOT needed on the EV! It is the exhaust heat shield that
is required for the gas car so the bags or the tubing will not melt. If this
had been a gas car, you'd have needed to clamp the exhaust pipe, and strap
two heat shields around the air bags. As it is, this stuff just goes into
the junk bin for future projects.
Click for |