Rav Brake Pad Replacement
Feb, 2008. After 52,000 miles, the brake squeal finally got the best of me. It turns out that there was plenty of life left in my pads, but the lubricant on the shims had hardened and was therefore useless. Since I had new pads on hand, and was already going through the trouble, I replaced the pads instead of extending the life of the existing ones. I order the Raybestos pad kit (PGD562QS) kit from Rock Auto. They had a "wholesale closeout" kit for $28, or the " regular inventory" kit for $48. I figured I'd take a risk and go the cheap route, and was glad I did. I'm not sure what the difference is, but the Wholesale package has everything you need. I also used a can of brake cleaner and a tube of 133A Permatex Anti-Seize goo. I've been told that CRC's Disk Brake Quiet is the bee's knees as well, but didn't use it on this job.
Other replacement pad options here.
Once you get the proper wrenches sorted out, this is a pretty simple task. The shop manual shows everything you need to do, but chasing down the torque specs and wrench sizes can be a bit of a pain. Here, let me get that for you:
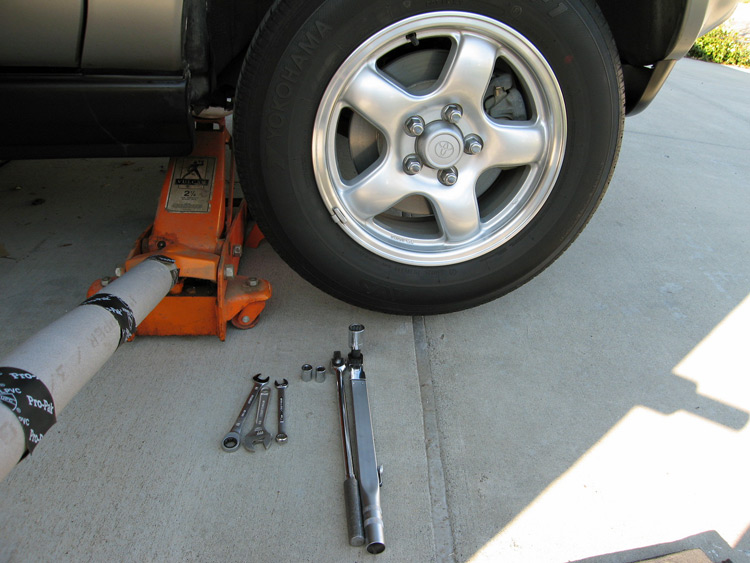
Here is the whole collection of tools needed. Jack stand is hidden behind the wheel - don't just support the car with the jack!
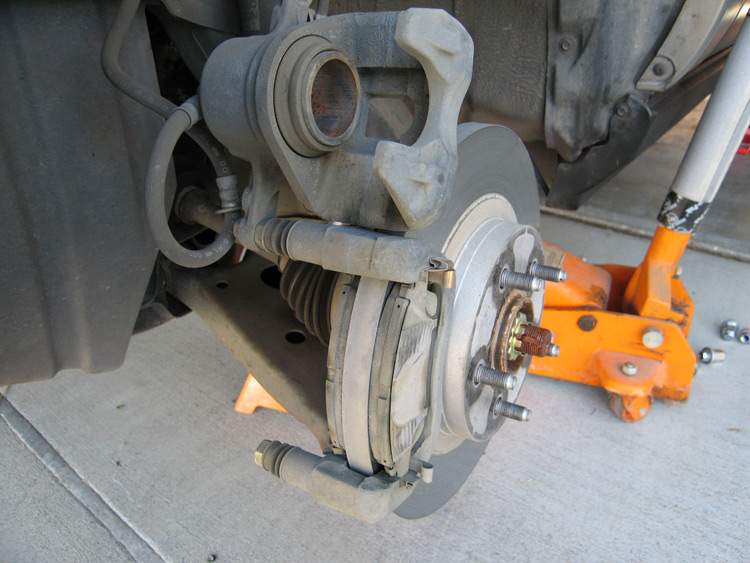
Photo taken before I touched anything after taking the wheel off. Here you can see the rubber hose bracket bolt (just above the disk) that needs to be removed.
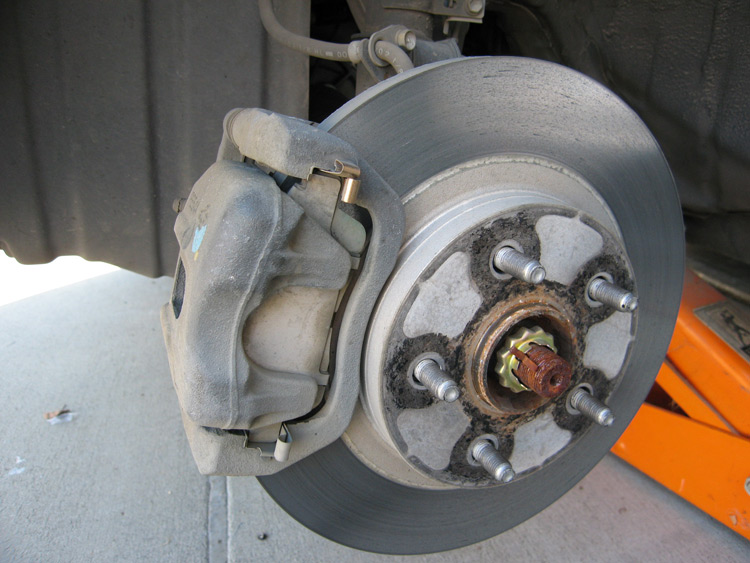
This is the window through which you are supposed to determine how much pad you have left without taking the caliper off. The lower caliper "sliding pin installation bolt" is the only other bolt you need to remove now.
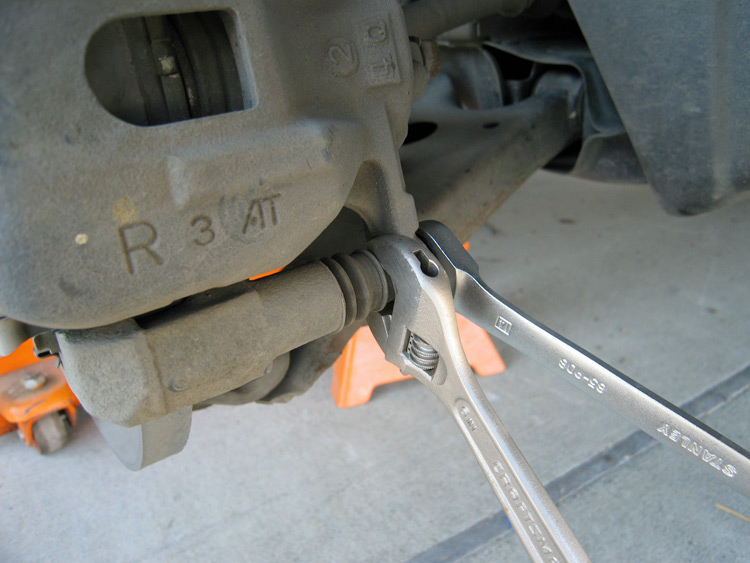
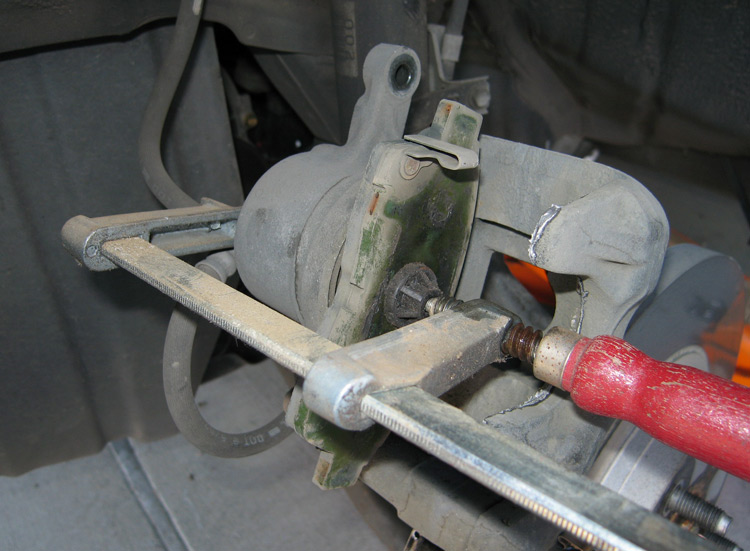
And here is how you remove it.
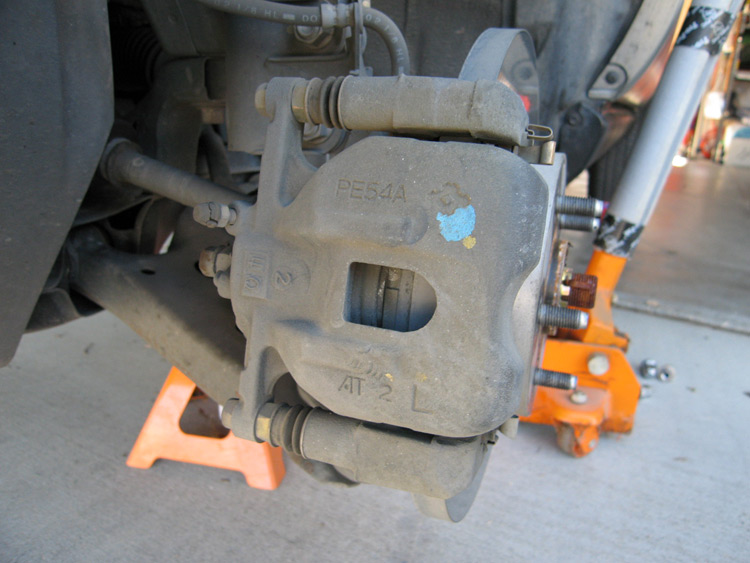
Flip the caliper up, and you get a REAL view of your pads and the disc. One mm is the minimum pad thickness - I have about five left.
Another view showing the caliper flipped up.
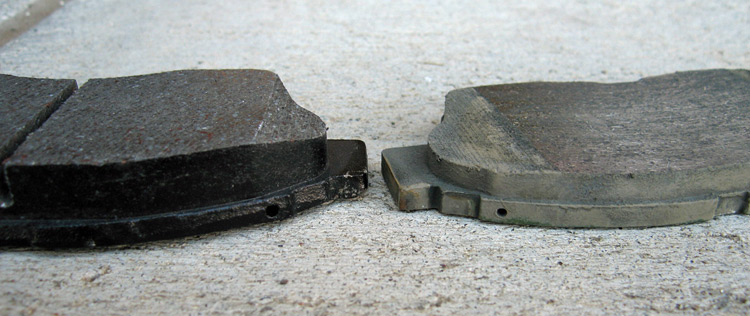
New pad on the left, old on the right.
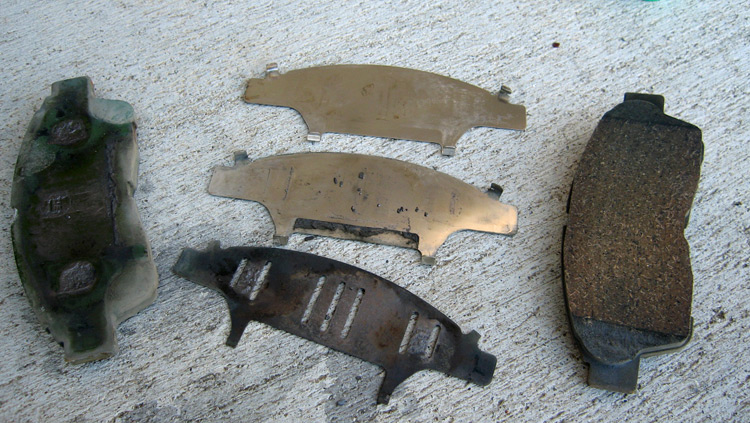
This is all the old stuff. The exterior shim at the top has been cleaned. The middle one I'd started on, and the (discarded) inside shim is a mess. The new pads come with new inside shims, so the "double-ended slotted pig" is not needed.
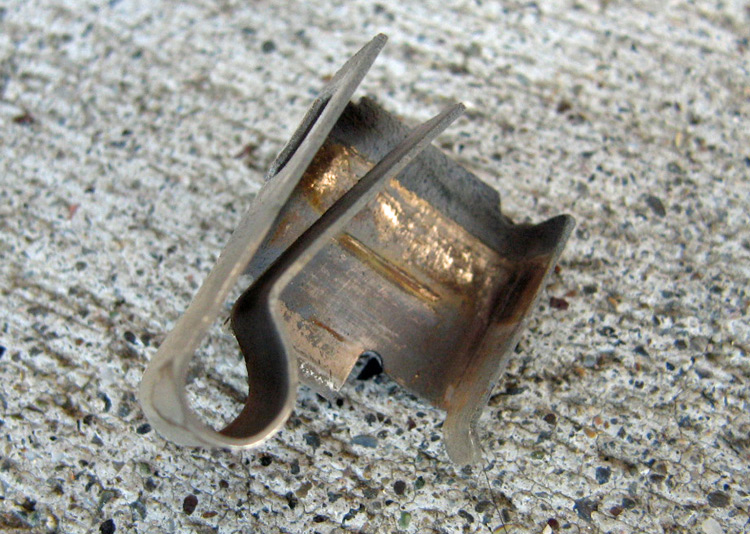
Then there are the caliper retaining clips (two on each pad). Here is what they look like before cleaning. Brake cleaner and a tooth brush tuned them right up. I cleaned the clips and the notches they sit in.
Then it is time to push the piston back in. I had no trouble with this, though on other cars this could be a real hassle! I just used a screw clamp and one of the old pads to shove the piston back in to make room for the thicker pads. I had plenty of room in the master cylinder reservoir, so I didn't even touch the brake fluid.
I don't have pictures of gooping the pads and shims with the anti-seize (well, you can see the silver goo on the outboard part of the caliper above), and reinstalling everything, so you'll have to use your imagination. I put everything back together, torqued all the bolts and went for a ride. When the pads were first seating, I got a quick squeal, and they've been quiet since. If the squeal comes back before the next 50,000 miles, I now know how to deal with it, without needing new pads. Whatever goo they used at the factory was NOT up to the task. It was hard, brittle and totally useless.
** thanks to Rob S. and Nate V. for their valuable input!
Click for |