Rav4EV LED Dome light, V1
These pictures show the journey from my first attempt at building a drop-in LED module to the great "production" run of about 10 units. I have since updated my dome light with programmable driver, the uFlex and two 1W emitters - See V2 here. But this drop-in version is still the easiest and cheapest way to upgrade to a high-performance LED dome light.
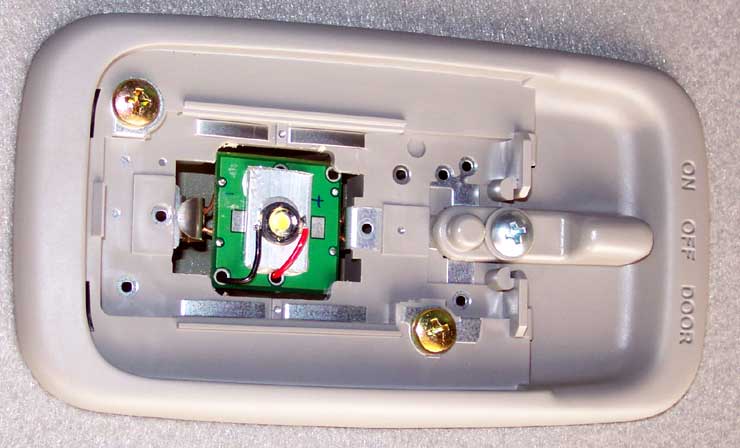
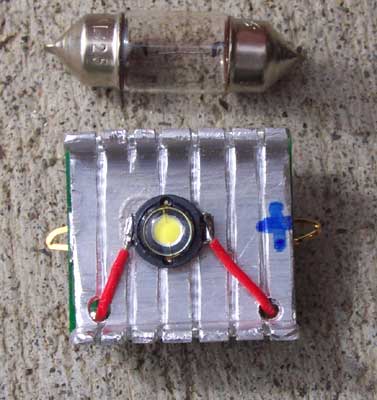
The stock dome light bulb uses 9W. This "drop-in" module consisting of a fully current-regulated driver with a large Vin range, and a 1W Luxeon Star LED consumes just a bit over 1W and offers whiter light that is as bright as the replaced incandescent. With this LED substitution, any of the back three doors can be (accidentally!) left ajar for about eight times longer before the Aux battery is killed. The assembly drops right into the light fixture in place of the stock bulb. The bulb can just as easily be replaced later if desired.
Purchase information can be found at the bottom of this page.
V1.0. These first few pictures are of my first
prototype unit.
Believe me when I say that the LED is way brighter
than it looks here. It would hurt to do this with the naked eye.
V1.1. Below is the LED replacement next to
the stock bulb. I've found that I needed more heat sinking since my first attempt
shown above, and this is one of my iterations:
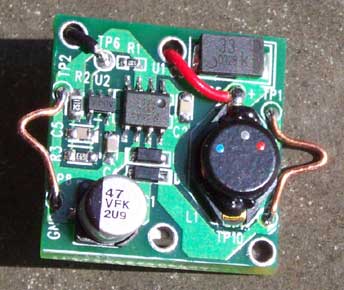
V1.2. Now I'm in mass-production. If you call
a total of ten units "mass" :-) I created a new heat sink under the
"star" configuration of the Luxeon LED. The entire sandwich is glued
together with thermally conductive epoxy.
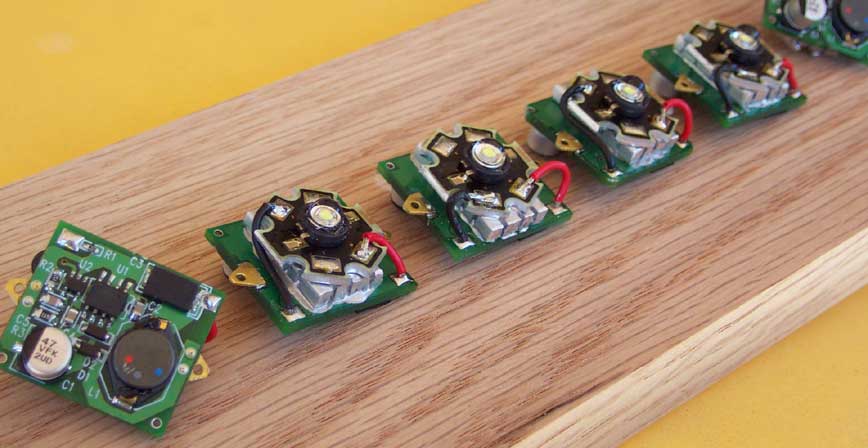
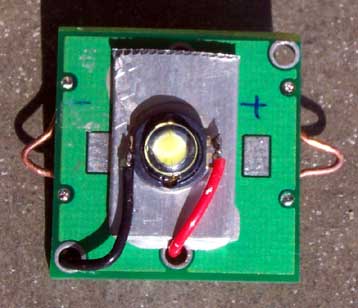
V1.3. (01 Jan 06) The current design uses a
higher-output LED and is the easiest to install yet.
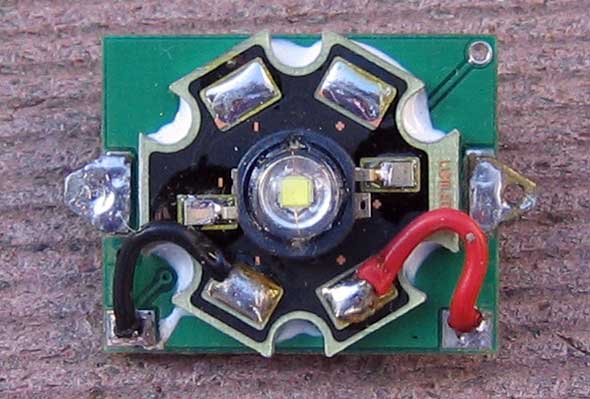
Here is the latest version installed. Please
use this photo to determine orientation. Here the switch and positive (red)
wire are on the right, while the bulb thumb tab and negative (black) wire are
on the left.

Rav4 rear dome light drop-in, current-regulated, high-power, white LED modules can now be purchased.
Pricing:
1 white dome module: $40 + $5 for uninsured Priority mail anywhere in the US.*
* Once the package is in the possession of the USPS, I cannot afford to be responsible for the package. I do want everybody to be happy with this product though, and will do what I can to make any problems right. If you want your package insured, please add $2.50 per module. Any number of modules you wish to order will ship for the same $5 plus any insurance you would like to add.
Payment:
Cash PayPal Preferred! (in other words, PayPal funded by anything other than Credit Card). If Credit Card must be used, I'll ask that you add 4.5% of the total price to cover my acceptance fees. When ordering via Paypal, please write exactly what you are ordering in the notes section of the paypal form. I sell modules for a few other vehicles, and it can get confusing! Email me before sending any money to make sure that I'm still offering what you want! darell at evnut dot com.
Questions before ordering? I'll happily try to answer them. Please note that I am a one-man operation here. While I strive to have minimal lead-time on the product, and I try to answer my emails promptly, I sometimes travel, I sometimes sleep, and I sometimes have *gasp* other things to do. It is usually best to let me know what you'd like to order before sending payment - then I can give you an estimate for lead-time and availability. Plus this way you can make sure I haven't been hit by a bus before sending money.
Installation
First turn off the light fixture switch so the bulb will be cool enough for removal. Now remove the dome lens by sticking a finger or two into the lens opening where the switch comes out...and yanking that edge straight down. The lens will pop off. Now, assuming the bulb is cool enough, pluck it out of the fixture by bending back the metal tab that holds it in (the tab is on the side opposite the switch).
Now we put the new module in. Make sure that the fixture power is off to avoid shorting any of the circuit during installation (and thus blowing the LED). Polarity matters! You won't hurt anything (circuit is reverse-polarity protected) if you install it backwards, but you also won't get any light. The side of the module with the red wire (and there is a screened "+" on that end of the board too) goes toward the switch of the light fixture (please see the photo above the pricing section). Insert the positive contact nubbin into the bulb holder hole on the switch side first, and then with your finger holding the metal tab as far back as it will go, shove the negative nubbin into position until the it pops through the bulb holder hole. You may have to push it and/or wiggle it a bit to pop it into place - but you only have to do this once, so go for it. Just don't push directly on the LED emitter itself, and you should be fine. It'll go in eventually. Have faith. Once in, throw the switch to make sure it works, and marvel at the wonderful light. Now snap the dome lens back on and pat yourself on the back for having the highest-tech dome light in your neighborhood. That it happens to be installed on the highest-tech vehicle in the neighborhood is just icing.
Please note: These circuits and complete modules are tested extensively before shipping. If installed correctly, these modules should last longer than the vehicle.
Click for |