Rav Rear Shock Absorber Replacement
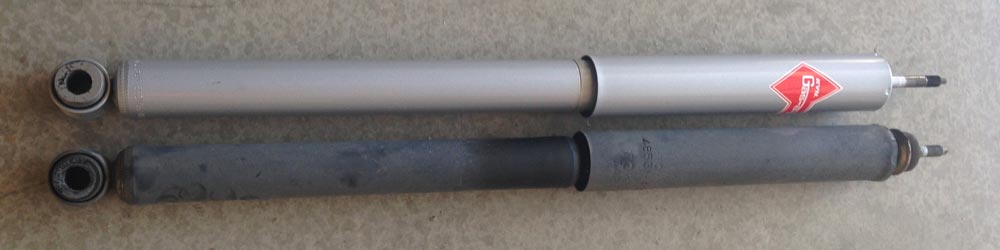
KYB Gas-A-Just Shock Absorber, model: KG4738
October 2013, installed KYB Gas-A-Just rear aborbers at 98,000 miles. These are about the same price as the factory shocks, are made better, work better, and come with a lifetime warranty. Do youselve a favor and don't fool around with the factory units. Just not worth it! This is probaybl the cheapest and easiest way to make your Rav4EV feel like new again. Better, than new, actually.
No more pictures or instructions from this install, because it is the same as installing the factory units shown below.
New Gas-A-Just shock on top, old "new" factory shock on the bottom.
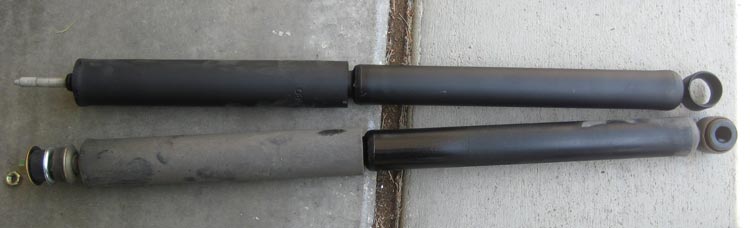
OEM shocks, model 48531-49155:
My first try was with OEM shocks. While having new tires installed at 55,000 miles, I noticed that one of my rear shocks absorbers was completely coated in the oil that is supposed to stay INSIDE the device. So much oil came out that it was actually dripping on the ground. Yes, my EV was leaking oil. *sigh* New factory shocks were $33.37 from my local dealer and I decided to just order them instead of trying to figure out what else might fit and work. Something stiffer would have been my preference though!
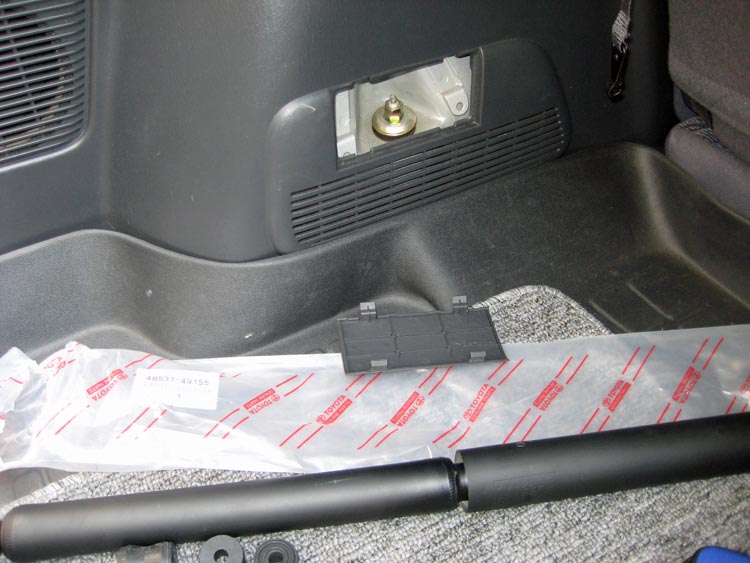
This is an EASY job. I did the whole thing with the car on the ground. No jacks or stands. I gooped everything up with anti-seize to prevent squeaking and to make future disassembly easier. It literally took 15 minutes to do both sides. One hint not included in the shop manual: The bushing with the concentric rings goes on the threaded upper shaft first. The flat bushing goes on last - inside the cargo compartment.
Process: Remove the two nuts at the top (from inside cargo area). Unbolt the bottom, and pry it off the post. Presto, the thing is in your hand. After stacking the bushings and washers correctly, shove the new shock up through the hole from the bottom, then compress the shock with your hand and slip the bottom bushing onto the bottom post. Install lower bolt and torque to 27 ft-lb. Install top nut until about one nut's thickness of threads are showing above it. Add second nut (should about perfectly cover the threads) and tighten the nuts together with a second wrench. Done.
New shock on the top, old leaky one on the bottom.
The upper access panel in the cargo area. Just pops off with a flat screwdriver. Both nuts are 14mm.
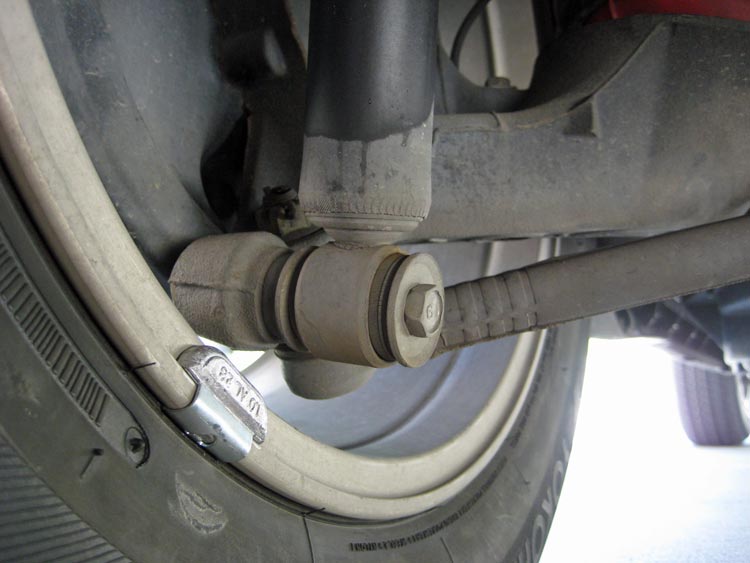
The bottom connection. 14mm bolt again. Here you can see the leaking oil running down my old shock. Notice here the orientation of the thick compression washers. They flange OUTWARD as they try to fatten up that lower bushing.
Click for |